
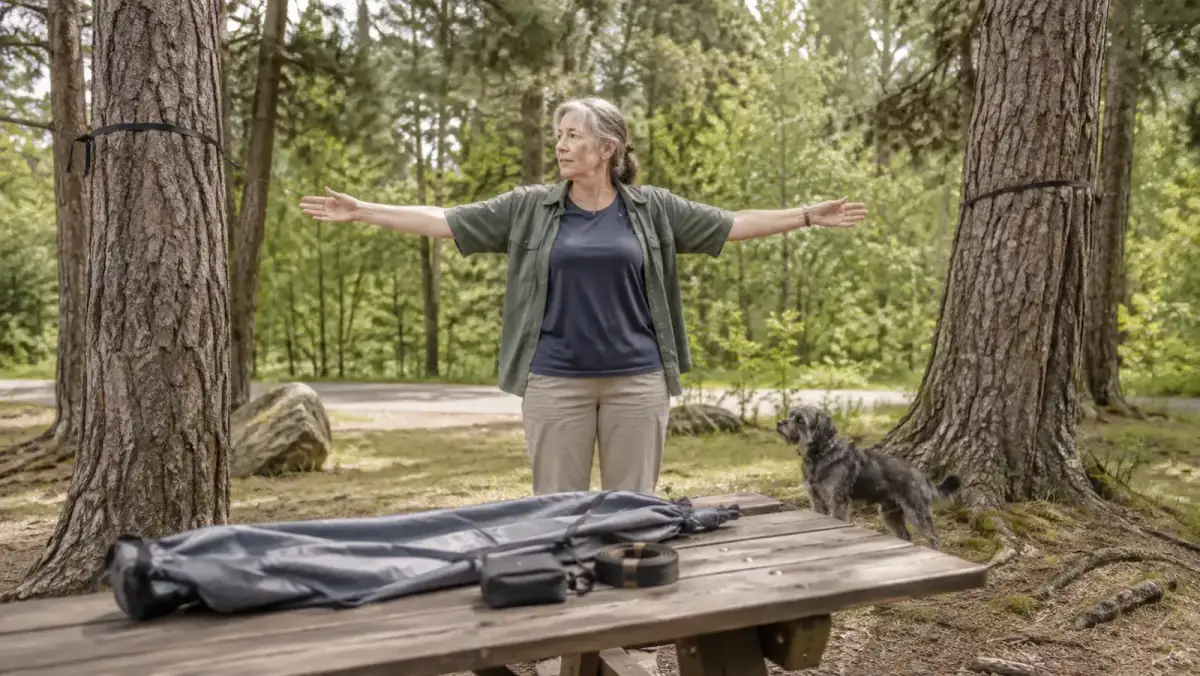
I hung my first camping hammock badly. Too tight, too high, between two trees that were really one tree with a split trunk, and I found that out the hard way when the whole thing leaned sideways the second I sat down. Nobody was there to catch me and nobody was there to laugh either, which is about how most of my mistakes at camp go these days. I've since hung this same Wise Owl Outfitters hammock at four state parks and three Corps of Engineers campgrounds, always alone, always with Biscuit supervising from a safe distance, and I've got the process down to something I trust now.
This isn't complicated, but it isn't nothing either. A hammock hung wrong is uncomfortable at best and a hard fall onto packed dirt at worst, and at sixty-six I'd rather not test how well I bounce. What follows is the exact order I go through every single time, with the actual numbers I use, not vague advice to 'find two good trees and go for it.'
I should say up front why I bother getting this exact rather than just eyeballing it. Twenty-eight years of driving a school bus taught me that the difference between a routine that works every time and one that works most of the time shows up on the one day you can least afford it. A hammock is no different. Get the height and angle right once, write the numbers down if you have to, and every camp after that goes the same easy way.
Before you pick your trees, know what you're working with.
This is the Wise Owl hammock and strap set I use for every step below. The straps are wide webbing, not rope, and they're the reason this whole process works alone.
Amazon Check Today's Price on Amazon →Step 1: Choose two living trees, spaced right
I look for a trunk at least six inches across at the height where the strap will sit, roughly the width of a coffee can. Anything thinner and I keep walking, no matter how convenient the spot looks. I also check that the tree is actually alive, full canopy, no big dead limbs hanging over where I'll be lying, and bark that isn't peeling off in sheets. A leaning, half-dead tree might hold my weight for a week and then not hold it on the one afternoon I need it to.
For distance, I want somewhere between ten and fifteen feet between the two trunks. Much closer than ten feet and the hammock hangs too steep and shallow to be comfortable. Much farther than fifteen and I run out of strap before I run out of gap, especially with the shorter straps that come standard on most camping hammocks. I pace it off in big steps, since each of mine is about right at three feet, and that gets me close enough before I ever pull a strap off the roll.
I also learned to look at what's below each trunk before committing. Two trees that split off the same base, or that share one shallow root ball you can see humped up under the leaf litter, move together instead of independently, and a hammock strung between them can sway in a way that catches you off guard. I want two separate trees with two separate root systems, even if that means walking a bit farther into the site to find them.
One more thing I check now that I didn't used to: what's underneath. I want clear, level, soft-ish ground below the hammock, not a fire ring, not a rock outcrop, not a tree stump. If I fall, and I have, I want the ground to be forgiving about it.
Step 2: Wrap the straps at chest height, not higher
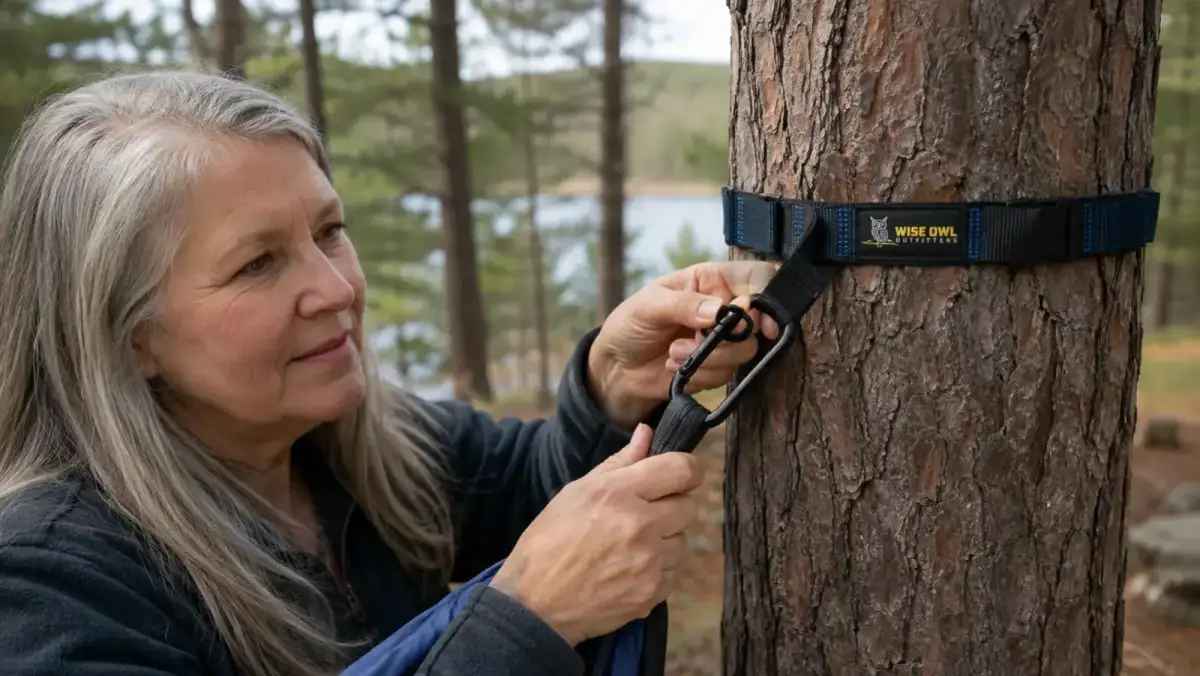
I wrap each tree strap flat around the trunk at roughly chest height for me, somewhere around four and a half to five feet off the ground. Higher than that and the whole hammock ends up too high to climb into without a running start, which is exactly the opposite of what I need. I wrap the webbing around the trunk twice, keep it flat rather than twisted, and make sure it isn't riding on a knot or burl in the bark that could let it slip.
The wide webbing straps matter here in a way I didn't appreciate until I saw what rope or thin cord does to a tree over a season of use. Rope digs a groove into bark and can girdle a young tree over time, which is the kind of damage that doesn't show up until the next camper's tree is dying. Flat webbing spreads the load out instead of cutting in, and it's a big part of why I only use straps built for this job rather than whatever cord happens to be in the truck.
I also tuck the loose tail of each strap back through the last loop it passed through, rather than letting it hang free. It's a small habit, but a dangling foot of webbing is exactly the kind of thing Biscuit likes to grab and pull on, and I'd rather not find that out mid-nap. This is also where a lot of people go wrong in a way that doesn't show until they're already lying in the hammock. If you want the fuller rundown of how these particular straps have held up for me after a full season of daily wrapping and unwrapping, that's covered in my honest review of this hammock, including the one time a strap did slip on wet bark.
Step 3: Clip in and set the hang angle, not a tight line
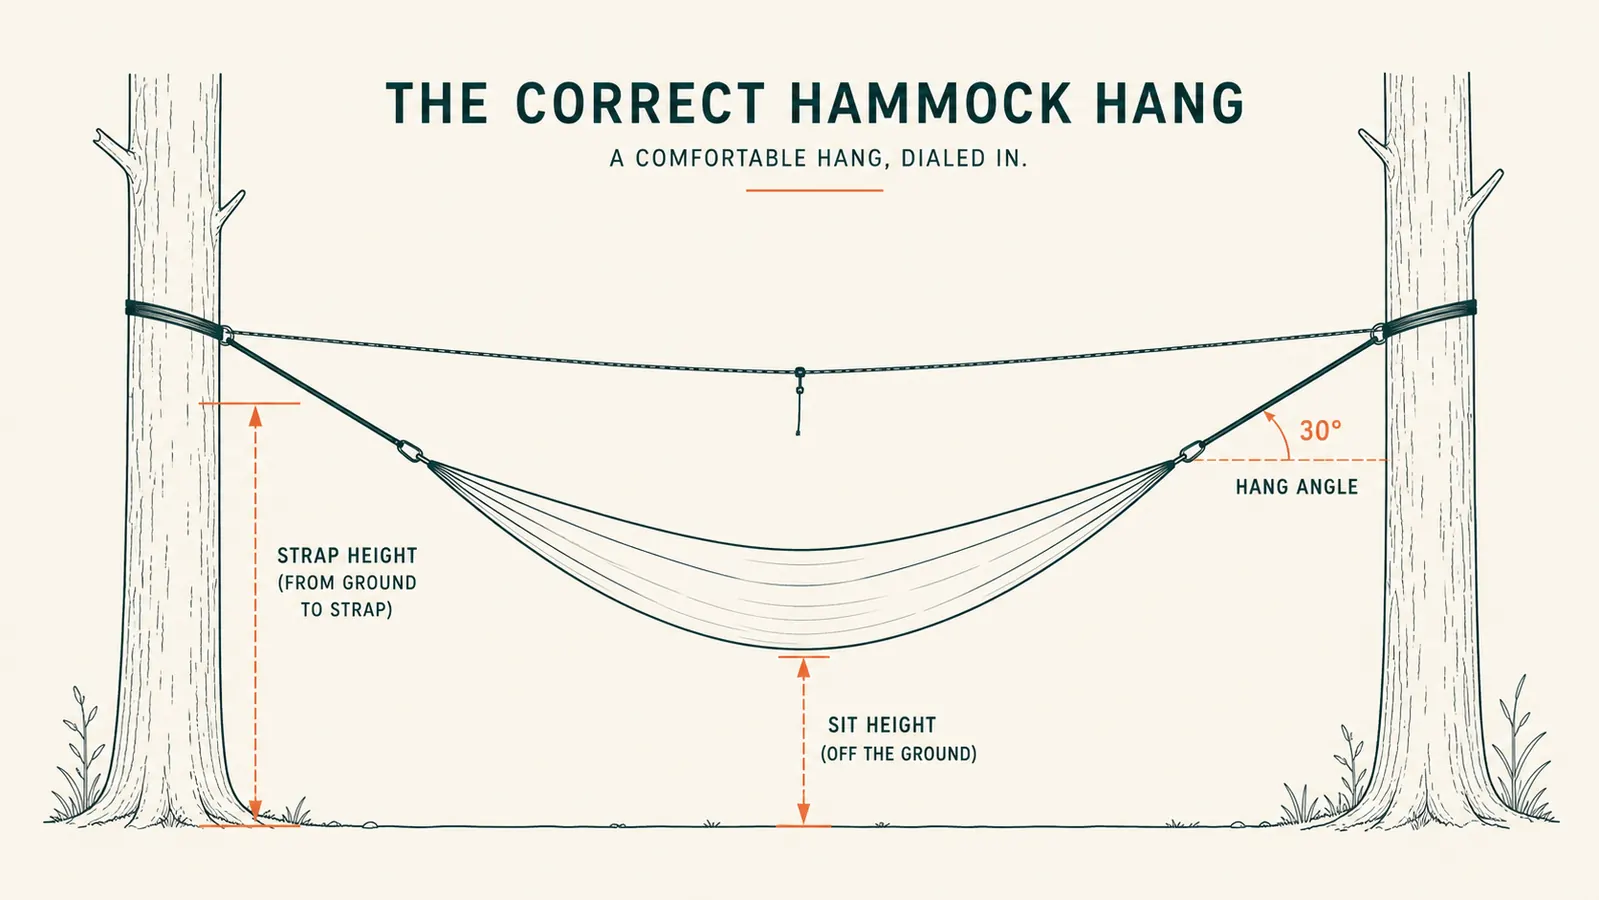
This is the step that separates a comfortable hammock from a banana-shaped one that pinches your shoulders together. I clip the carabiners into the strap loops and then, before I ever sit down, I adjust until the hammock has a visible sag rather than a straight, tight line between the trees. What I'm aiming for is roughly a 30 degree angle between the strap and a level line, which in practice looks like the middle of the hammock hanging noticeably lower than the two ends, maybe eighteen to twenty-four inches lower depending on how long the hammock body is.
The instinct when you first hang one is to pull it drum-tight, because a tight line looks neater and feels more secure standing there looking at it. It's the opposite of comfortable to lie in. A tight hammock forces you into a straight line and puts pressure right down your spine. A properly sagged one lets you lie on a diagonal, which flattens you out almost the way a bed does. That diagonal lie is the whole reason a hammock can rest a bad back better than a folding chair ever will.
If you're trying to decide between this style of hang and other hammock systems out there, including ones with a ridgeline built in that sets the sag for you automatically, I put together a full comparison in my piece on the Wise Owl versus ENO hammock, which gets into how each one handles this exact adjustment.

Step 4: Set your sitting height before you ever lie back
Once the sag looks right, I check the height of the lowest point of the hammock, the part I'll actually be sitting on. I want that somewhere around eighteen to twenty inches off the ground, close to the height of a regular camp chair seat. That's low enough that I can sit down on the edge of it the way I'd sit in a chair, both feet still flat on the ground, and swing my legs up and in once I'm settled rather than trying to climb or hop into it.
This matters more than people expect. A hammock hung too high looks impressive and photographs well, but it turns getting in and out into a small gymnastics event, and at my age I'm not interested in gymnastics events at any hour of the day. Too low, and the middle of the hammock drags the ground when you lie in it, which defeats the entire point of being up off the dirt in the first place.
If eighteen inches puts the strap wrap too high or too low on the trunk to hit the sag angle from Step 3, I move the wrap up or down the trunk a few inches rather than fighting the strap tension to force both numbers at once. It's easier to unclip, rewrap two inches higher, and reclip than to yank on webbing hoping it'll settle where you want. I'd rather spend an extra two minutes rewrapping than spend the whole afternoon annoyed at a hang that's almost right.
Step 5: Test it before you trust it
I never lie back in a freshly hung hammock without testing it first, and I'd tell anyone camping alone to do the same. I sit on the edge with both feet still on the ground and put my full weight down slowly, watching both straps for any slip or the carabiners for any sign they're not seated right in the webbing loops. I bounce a little, gently, still with my feet ready to catch me.
Only once that feels solid do I lift my feet and lie all the way back. I've had one strap slip about an inch on a wet morning at Kentucky Lake, caught it during this test step, rewrapped it, and never thought about it again for the rest of that trip. That's the whole reason for testing before trusting. A slip during the test is an annoyance. A slip once you're fully reclined is a fall, and at my age falls take longer to bounce back from than they used to.
What Else Helps
A few small habits make the whole setup better once the hammock itself is hung right. I always give the trees a second look after any hard rain, since wet bark grips a strap differently than dry bark does, and I've learned to recheck tension the next morning rather than assume it held overnight. I keep a folded towel or thin sit pad nearby for the edge, since that eighteen-inch sitting height is friendlier on the way down when there's a little padding to ease onto. And in bug season I keep the hammock's bug net zipped shut anytime I'm not actively in it, because Biscuit has never once resisted the temptation to nose his way inside otherwise.
On a multi-day stay I also recheck both straps every morning before I trust the hammock again, not just the first time I hang it. Wood shifts a little as it dries out or takes on moisture, straps settle into the bark over a day or two, and a five second look each morning has caught small slips before they became real ones more than once. It costs nothing and it's become as automatic as checking the trailer hitch before I pull out.
A tight hammock looks neater. A sagged one is the one you can actually lie down flat in and get back out of on your own.
Hung right, this is the easiest ten minutes of setting up camp alone.
Same hammock and tree straps I use for every hang described above, packed down small enough to keep in the trailer permanently.
Amazon Check Today's Price on Amazon →